
The past couple of weeks have been filled with lots of little “I need to do X, but to do X, I first need to do Y, and to do that I need to do Z” type tasks. One of those items was learning about and then writing a new Releaser plugin for tito. More on it specifically in a post to be written shortly, but now that I have my client SSL certificate updated in my browser (yet another upcoming post), I can write this post to talk about an issue I had while working with tito and Jenkins.
The problem
My goal at the time was to start automatically producing local versions of the tito package any time I did a commit to one of my branches. To do this manually for an actual “release”, one does it with the following command:
tito build --rpm
Yep… you build the package using the package itself, and is not unlike using the compiler to compile itself, then using that new executable to build the rest of the UN*X operating system. This is something I had automated decades ago, and did on a regular basis, even at one point triggering it off the email which CVS would send when I committed a change. And at CompuServe, I used to automatically deploy these changes if there were no compile errors to test machines. And while I could certainly do similar things today myself… why be stupid and reinvent the wheel, unless one needs a very non-standard wheel. But here, we come into one of those “to do X, first we must do Y” points.
When building a non-release version using tito, one must run a slightly different command. Here, using git‘s gitk utility, we see various “revisions” of the code, with each of the blue dots on what I think of as a rail yard network, with the rest of each dot’s corresponding line representing a change.
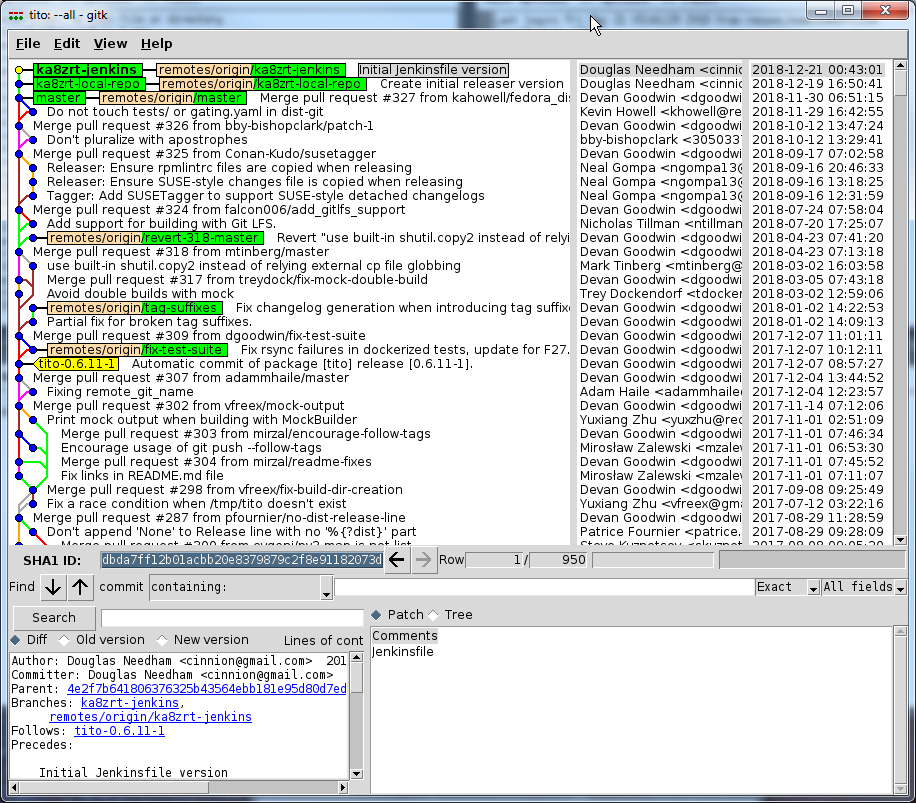
The reason for the slightly different command is because without an additional argument, tito looks for the most recent tag, and rather using the head of the branch, it does everything at the point of that last tag. This means that if I were wanting to build a test version of the code as it existed at the ka8zrt-jenkins branch at the top of this image, it would be instead be rebuilding things where the yellow tito-0.6.11-1 tag is… each and every time. Handy if you are only interested in installing it by hand yourself, such as when all the repositories you use are running behind, but for someone doing development of a package, it is something you must remember. And so, I need to instead run the following command:
tito build --test --rpm
The trick is, I need to have the file used by Jenkins aware of all the tags… only as of version 3.4.0 of the Jenkins Git Plugin, they made a change to stop pulling down the tags by default. Part of me can see why they might do this, but it means that I must make changes to deviate from the default behaviour… and unfortunately, they don’t do a good job of documenting what needs to be done, particularly given how greatly pages may differ from job to job, based on what appears to be the job type.
GitHub Repository Jobs
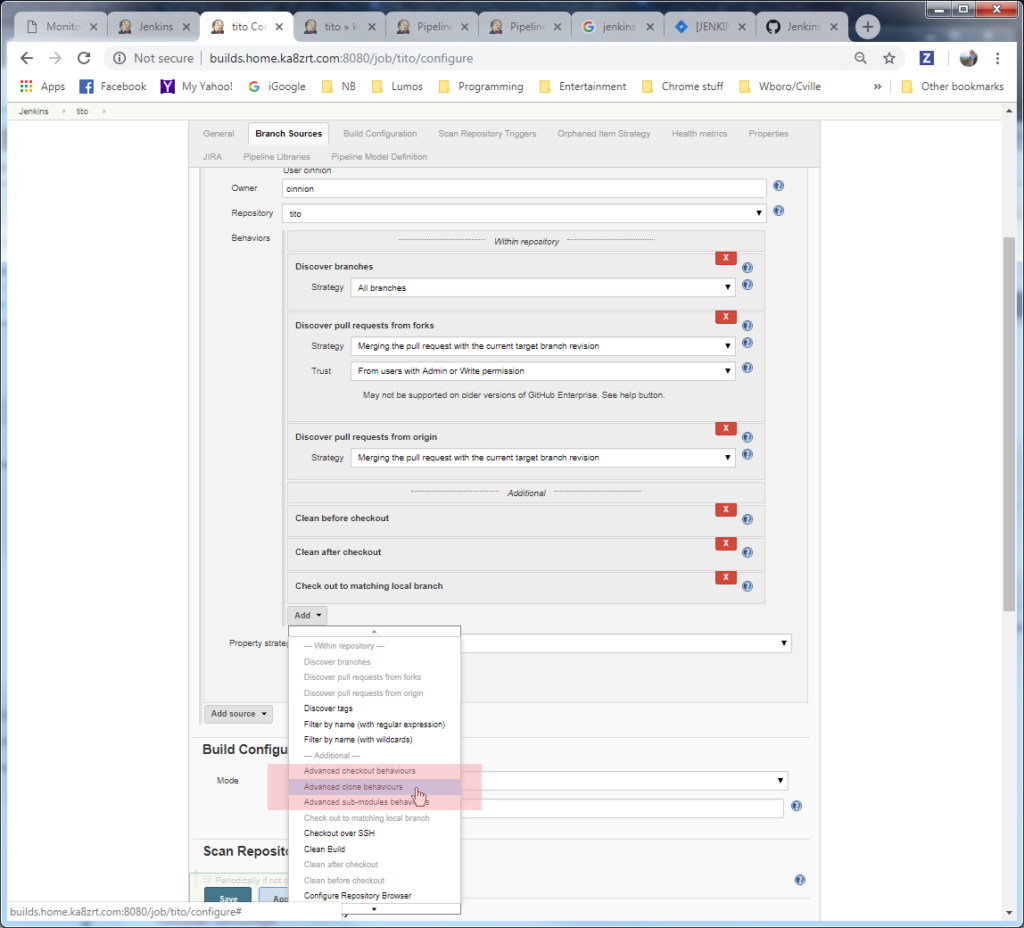
What needs to be done is this. If you go into the job, and click on the Configure link (either on the dropdown for the job on the dashboard, or in the menu on the page for the job), it will bring up a page which a number of “tabs” (to truly be tabs, the others would either compact or disappear entirely) for the job ranging from General settings, to Branch Sources, Build Triggers, and other sections. Then going to the Branch Sources section of the GitHub Repository job, scrolling down through the section, we find a Behaviours subsection, with an Add button at the bottom. Clicking on it, we see the following, with Advanced Clone Behaviors picked in the list (highlighted below).
Selecting that item, we get a new subsection, seen here:
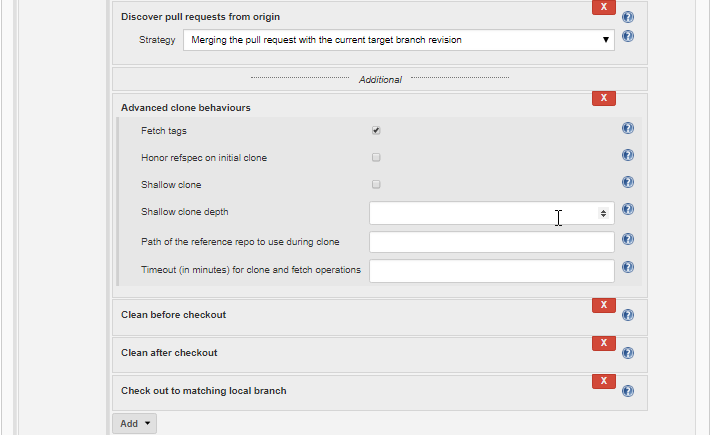
Note the top item in the new section, labeled Fetch tags, which is checked. This is what will allow the tags to be fetched, and for the Jenkins job and tito to be able to do their thing.
Pipeline Jobs
For a regular pipeline job, the Add button is at the bottom the Pipeline section of the screen. As before, clicking on that button presents a dropdown list, from which Advanced Clone Behaviors is picked to add the corresponding subsection.